I would like to inform you that a huge new update to Ab4d.SharpEngine has been published. The Ab4d.SharpEngine is a cross-platform 3D rendering engine for desktop and mobile .Net apps.
Here is the list of the highlights for this version:
- Improved rendering semi-transparent objects.
- Added support for post-processing effects.
- Added support for rendering object outlines that are rendered on top of other objects.
- Added InstancedTextNode that can render millions of characters.
- Added support for billboards (pixels with textures).
- Added ModelOptimizer that can optimize rendering static objects.
- Added support for rendering depth pre-pass rendering step.
- Added .stl file importer and exporter and .obj file exporter (note: .obj importer was already available).
However, before I provide additional details about those changes, I would like to announce another significant update: from version 3.1 onwards, you can use the Ab4d.SharpEngine on desktop and mobile devices with the standard license. This means that it is no longer necessary to purchase an additional mobile development license when you want to develop for mobile devices. If you already have a standard license, then you only need to upgrade the version of Ab4d.SharpEngine to v3.1 and you will be able to use the library on mobile platforms.
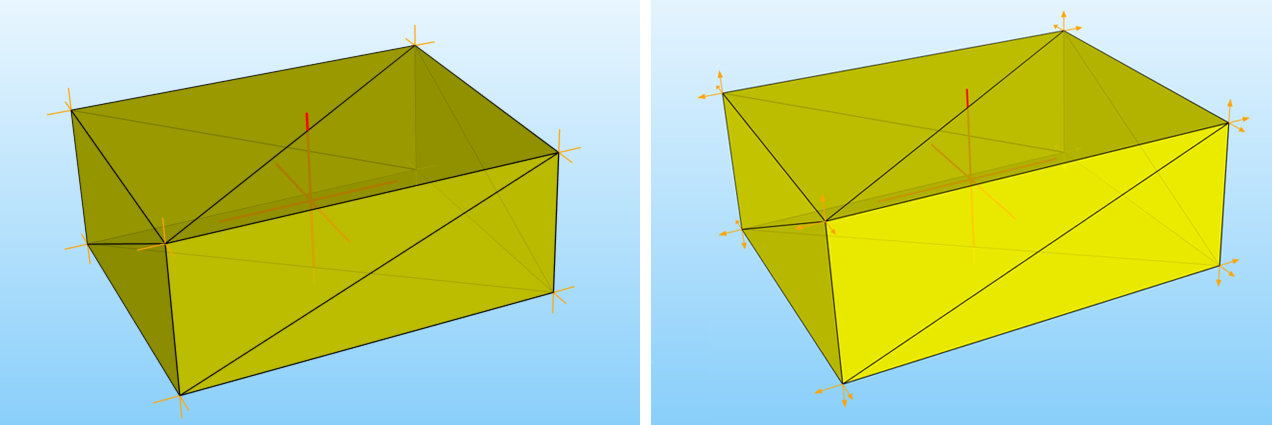
And now let me describe the major changes in more detail. If you are using semi-transparent objects, you will likely notice that the colors of those objects are different in the new version. The problem with the previous version was that for some materials, the alpha value was applied twice, which made some objects appear too dark. See the comparison (the left image shows the previous version; the right image shows the new version):
What is more, IsPreMultipliedAlphaColor property was added to VertexColorMaterial, PixelMaterial, PixelsNode and InstancedMeshNode. This makes it easy to define how the Color4 values are defined. By default, all values are defined without pre-multiplying the alpha value. But if you want to use alpha pre-multiplied colors, then you can set the IsPreMultipliedAlphaColor property to true. The alpha pre-multiplied colors are colors where the red, green and blue color values were multiplied by the alpha value. The graphics card requires that color format and the new version can now correctly provide the color in the correct format.
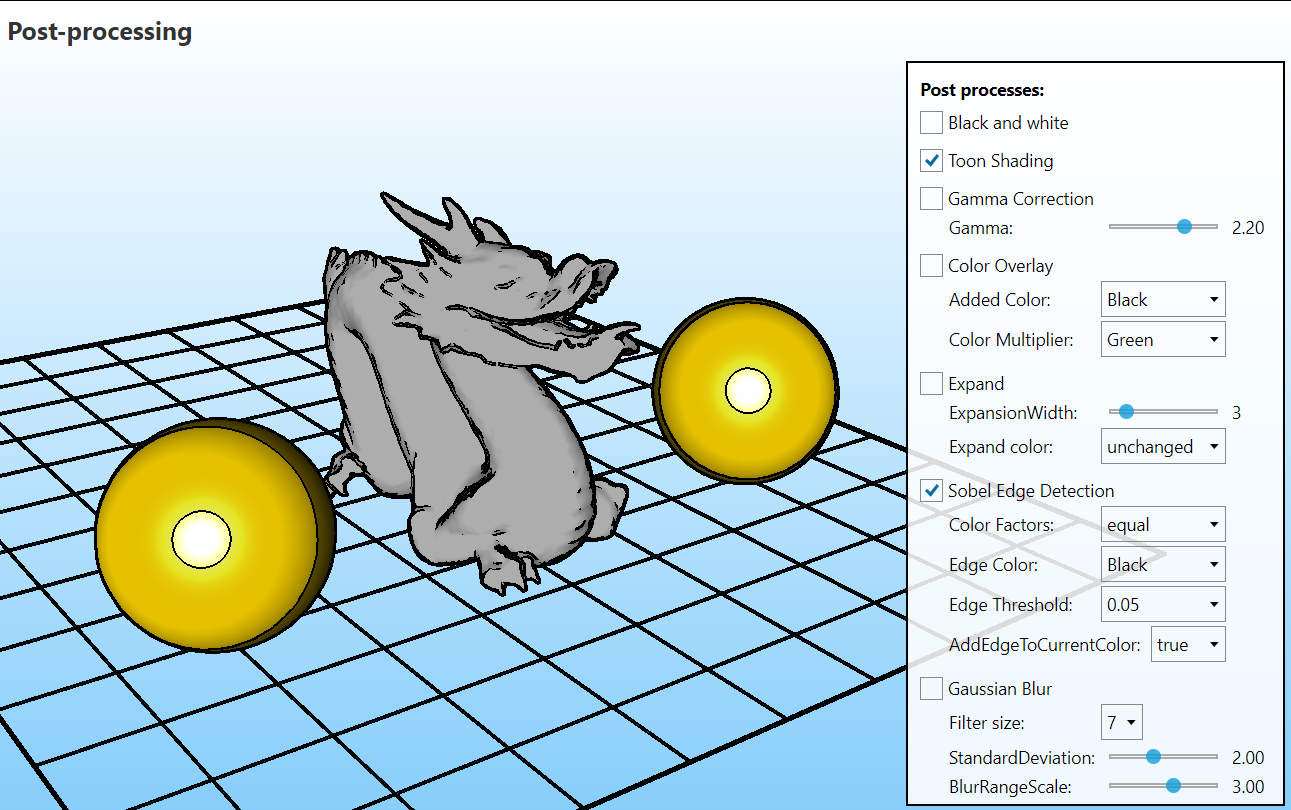
The next big new feature is support for post-processing effects. Post-processing effects are executed after the 3D scene is rendered and can utilize a fragment shader code to adjust the colors of the rendered scene. The following post-processes are available: SobelEdgeDetectionPostProcess, BlackAndWhitePostProcess, ToonShadingPostProcess, GammaCorrectionPostProcess, ColorOverlayPostProcess, ExpandPostProcess and GaussianBlurPostProcess. It is also very easy to add custom post-process effects. This is demonstrated with a custom HsvColorPostProcess that is available with full source code. The following screenshot shows the new Post-processes sample:
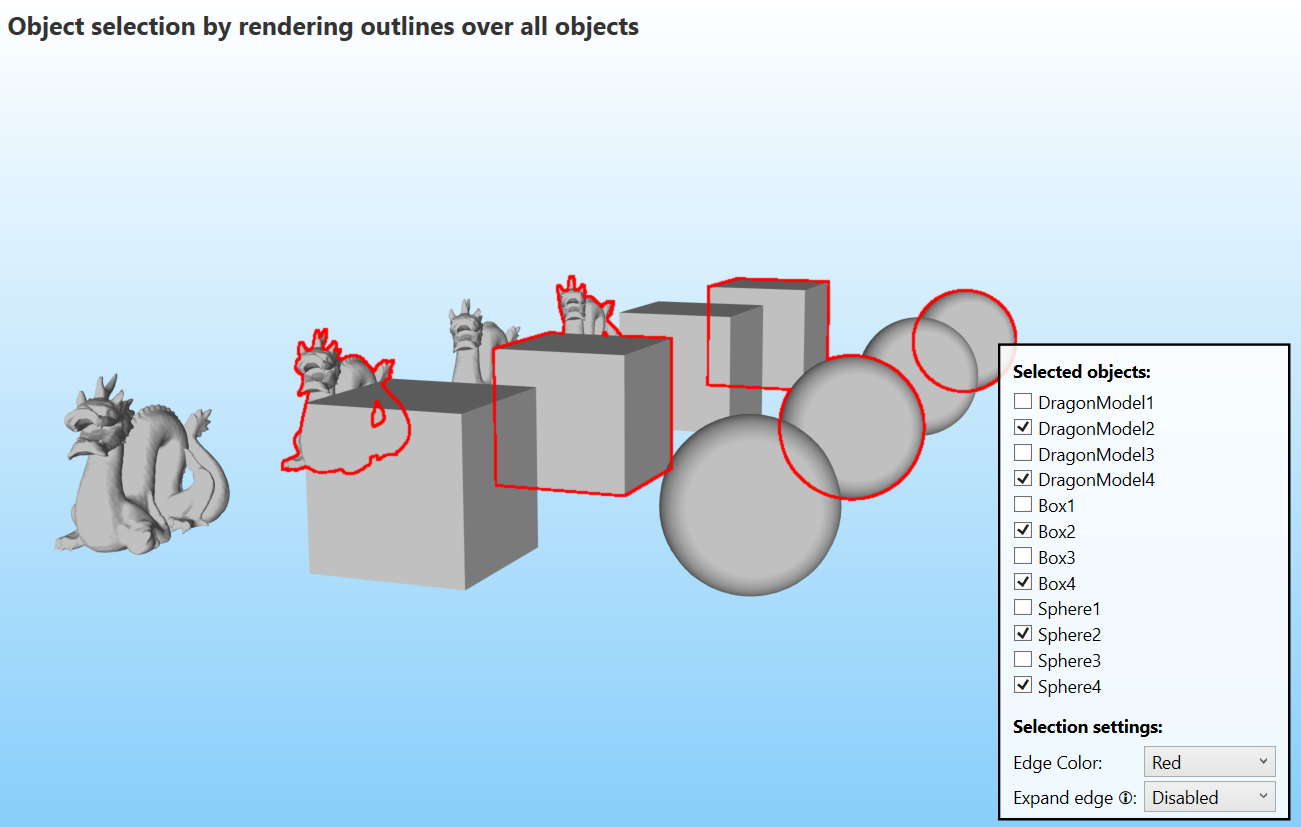
The new post-processing effects provide the building blocks for another highly requested feature: rendering object outlines that are also visible behind other objects. This is possible by rendering the selected objects to their own render target and then using SobelEdgeDetectionPostProcess and ExpandPostProcess. Then the 2D image that is created by those two post processes is drawn on top of the standard rendered image. The following screenshot shows that in action:
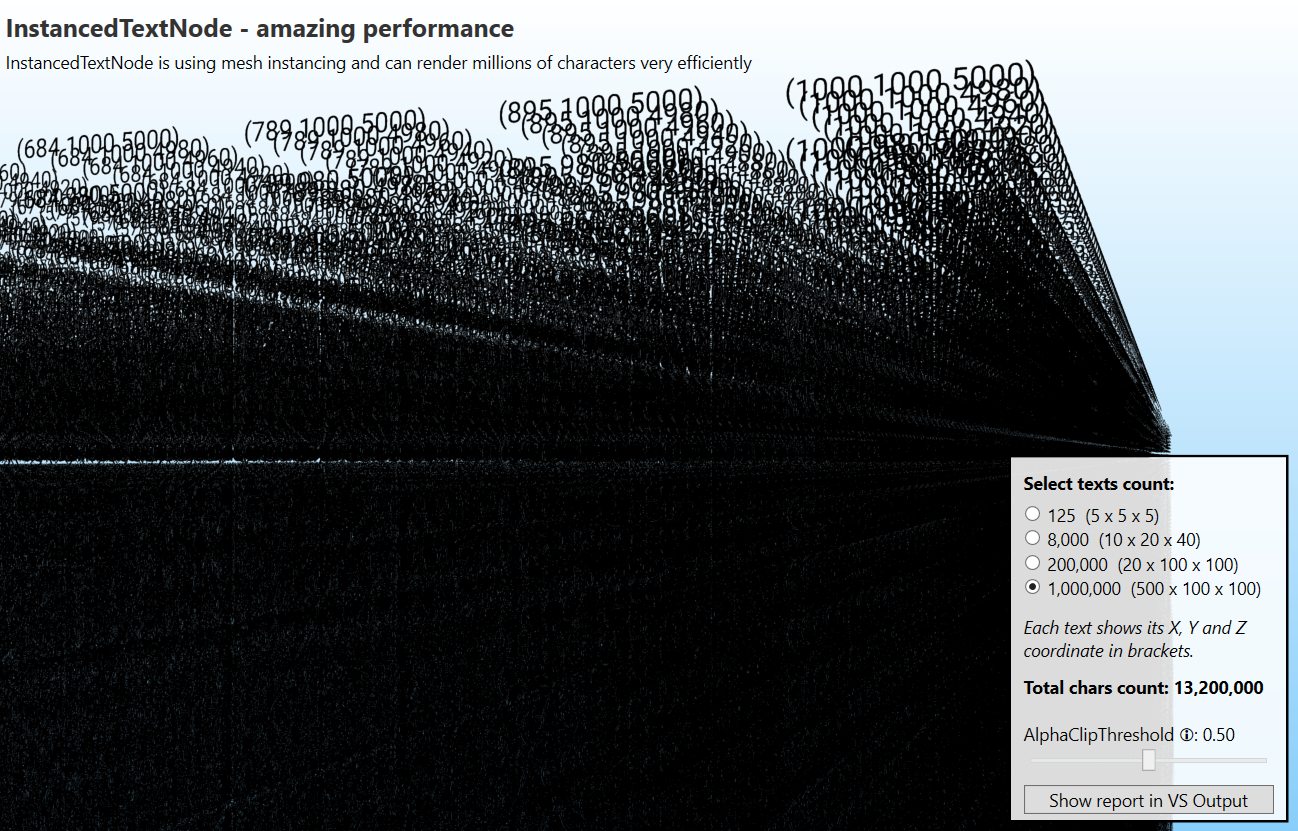
Another very impressive new feature is support for using instancing to render text. This is done by using the new InstancedTextNode. This SceneNode object can very efficiently render millions of characters. This is achieved by rendering all instances of a single character with a single draw call using mesh instancing. We all know that modern graphics cards are very fast. But it is hard to actually see that speed. The sample that demonstrates the InstancedTextNode can help us see how extremely fast the graphics cards are. For example, the following screenshot shows the sample with the default settings:

As you see, this shows 8000 individual texts where each text represents its x, y and z coordinate values in brackets. This requires rendering 108,000 individual characters. The 8000 value was chosen so that it is still possible to see individual texts. But this is far from what a modern graphics card is capable of. If you select the last option with 1 million coordinate texts, then after a few seconds of initialization, the following scene is shown (showing more than 13 million individual characters):
It is really impressive to see how fast such a 3D scene can be rotated by the mouse and how many calculations are required to achieve that.
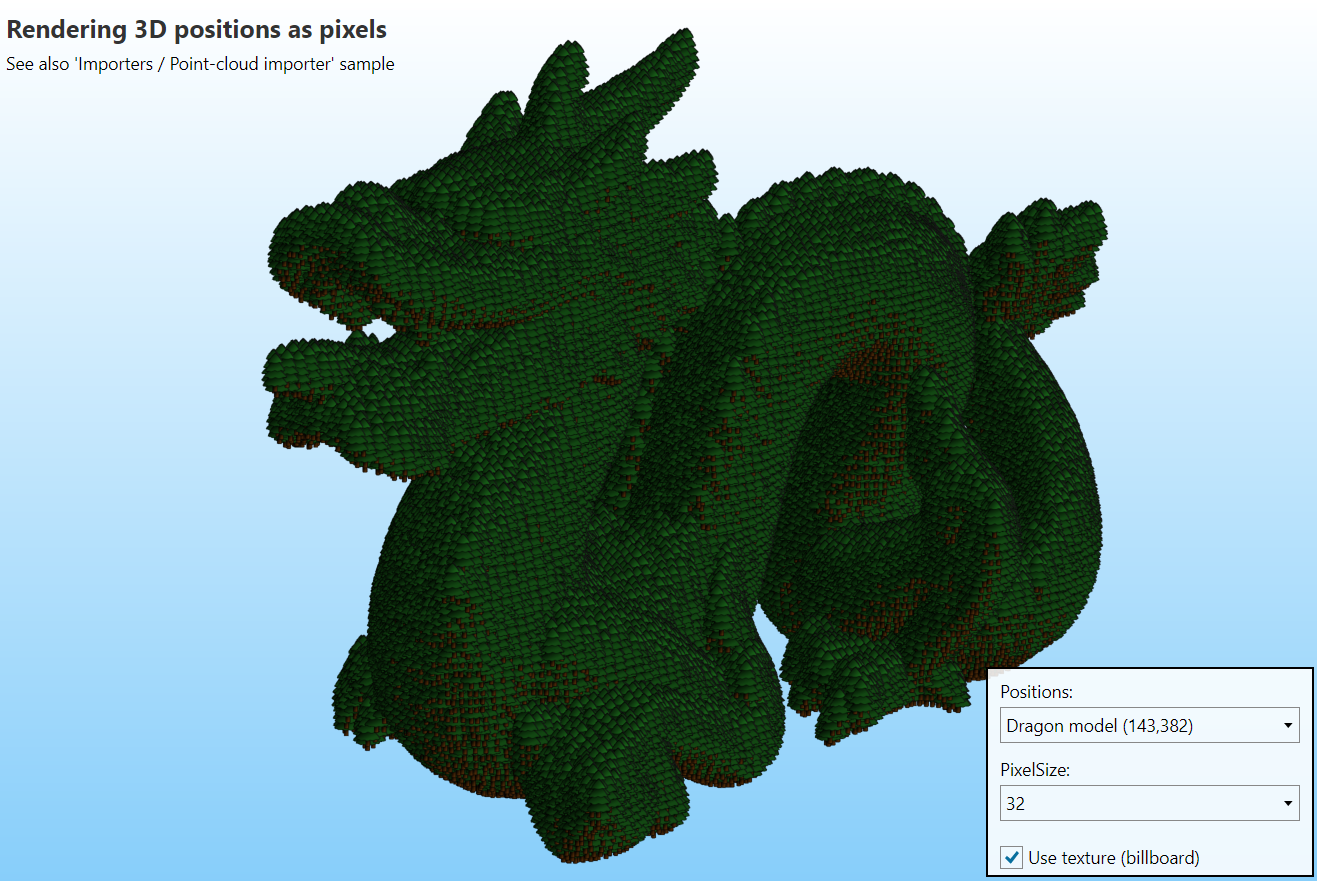
Another similar new feature is support for rendering billboards. Billboards are texture images that are always oriented towards the camera. In the new version, billboards can be rendered by using PixelsNode and assigning a texture to be rendered for each pixel. This can render millions of billboards very efficiently. The following screenshot shows the updated pixels sample that shows tiny tree textures instead of square pixels:
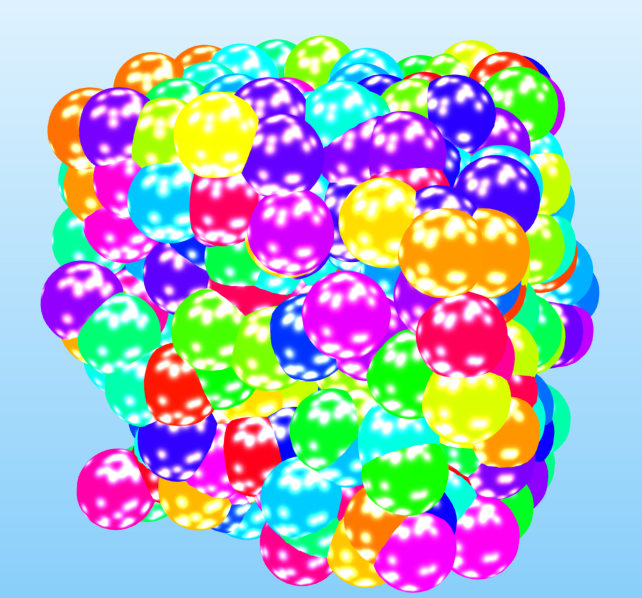
As it is demonstrated in the new "Pixels rendering options" sample, this also allows rendering circular pixels. In this case, a white circle texture is used for each pixel (the texture color is white, so the final circle color is defined by multiplying the white color by the pixel color).
I have helped many customers improve the performance of their applications with 3D graphics. In most cases, the most significant reason for slow performance was the large number of draw calls. A draw call is a command for the graphics card to render one object. In Ab4d.SharpEngine each SceneNode object usually requires one draw call. When the scene is defined by a few thousand small objects, then the performance may begin to worsen. The reason for this is that for each draw call, the driver and the graphics card must assemble a new job and execute it. This can take significant time. It is much faster to issue just a few draw calls, where each provides a lot of work for the graphics card.
This concept can be demonstrated by running the "3D Lines / Lines performance" sample. With this sample, it is possible to render millions of line segments. This works very fast when there are not a lot of lines and when each line has many line segments. However, if the number of line segments is reduced and the number of lines is increased, then the performance drops significantly. This indicates that issuing a small number of demanding draw calls is faster than issuing many simple draw calls. Instancing also greatly demonstrates this principle.
When you generate the SceneNodes objects by yourself, you can usually group many objects into a small number of more complex objects. But when you import 3D objects from files, those 3D objects may be purely optimized with many small objects. If you do not need to change those objects (they are static) in the 3D scene, or if the objects are only rarely changed, then it is now possible to optimize the objects.
This is done by using the new ModelOptimizer. It can be used to optimize the GroupNode by combining meshes in SceneNodes with the same materials into combined SceneNode objects. The new sample that demonstrates this loads an obj file with an old sailing ship. The ship model is composed of 3381 objects. When using ModelOptimizer, those objects are combined into 30 objects. That renders the scene much faster.
Another new optimization that is available with the new version is rendering the so-called depth pre-pass. In this case, all 3D objects are first rendered only with the vertex shader (fragment shader is disabled). This does not render any pixels but only fills the depth buffer. After that, the standard rendering is executed. But because now the depth buffer is already filled with the final versions of the depth, the fragment shader is now executed only for the pixels that will be actually visible. For all other pixels that are farther away from the camera and would be discarded, the fragment shader is not executed. Because all the lighting calculations are done in the fragment shader, this can provide a huge performance boost for 3D scenes with a lot of overdraw (many 3D objects are occluded by other 3D objects). This is especially important on slower graphics cards, for example, those on mobile devices.
The following screenshot shows the 3D scene that is rendered by the new "Depth pre-pass rendering" sample:
When this sample is run without depth pre-pass and then analyzed in RenderDoc, the following image shows the amount of overdraw:
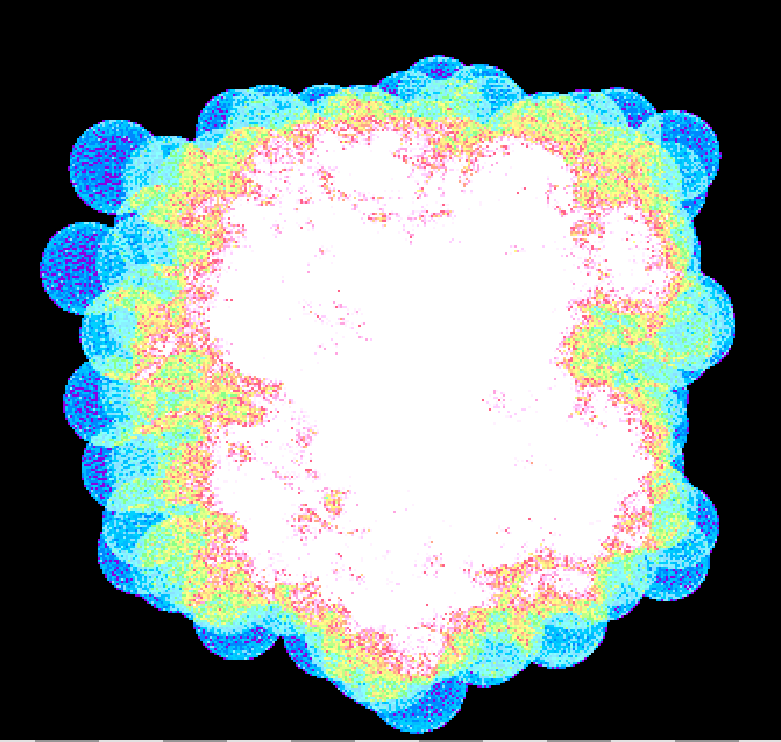
In the image, the white area represents pixels with more than 20 executed fragment shaders. Some pixels have even more than 50 executed fragment shaders. This means that to get the final color of that pixel, 50 invocations of the fragment shader were required. This can take quite some time.
When depth pre-pass is used, then all the pixels require only one fragment shader invocation.
I would like to conclude the description of highlighted features with improved object importers and exporters. The previous version of Ab4d.SharpEngine included an importer for .obj files. With an additional Ab4d.SharpEngine.glTF library it is also possible to import and export glTF files. To import other files, you need to use a third-party Assimp library. That library can import from many file formats. But because it is a native library (not written in .NET), it may be hard to distribute it with your application, especially if you want to create a cross-platform application. Because of this, the new version got a new .stl file importer and exporter. Stl file is very commonly used for 3D printing so including that into the Ab4d.SharpEngine makes it very easy to create helper tools for 3D printers. What is more, the new version also has an .obj file exporter. It can be used to easily export the 3D scene into an .obj file.
Those are only some of the new features. There are many more changes and fixes. To see all of them, please check the Ab4d.SharpEngine change log.
The easiest way to explore the new features is by getting the updated samples from GitHub (note the UP and NEW icons after the name of the sample to see the changed samples; the UP icon also contains a ToolTip with the description of the change).
For the conclusion, I would like to wish you a nice summer vacation (if you are living in the Northern Hemisphere).
After the vacations, many new exciting things are coming: I plan to publish the alpha version of Ab4d.SharpEngine for the web (for the Blazor Web Applications). And after that, new versions of Ab3d.PowerToys and Ab3d.DXEngine libraries will be released with some great new features.