Though this year was very unusual, I am happy to conclude it by providing you additional great new features in the new version of Ab3d.PowerToys and Ab3d.DXEngine. And what is more, I am also giving you a 30% discount for any source code purchase.
In the last blog post, which was written just slightly more than one month ago, I have already mentioned that the libraries were tested with .Net 5.0 but not enough for me to release an official .Net 5.0 version. Anyway, if you checked the web page or your User Account page a few days after the release, you could see that the .Net 5.0 builds were already included in the installers.
I also wanted to update the NuGet packages, but it is not possible to change an existing version of the NuGet packages. And I also did not want to increase the version number without any change in the code.
Therefore I have uploaded an updated version of NuGet packages (.nupkg files) to the Downloads web page. I have also decided to provide a new version in December with some additional new features and an official .Net 5.0 support.
So, official support for .Net 5.0 is the most significant new feature. But the new version offers much much more.
The first new feature that I would like to highlight is the new InstancedTextNode class. It can be used to render millions (!!!) of characters in any font and style. It can be also used to demonstrate the immense power of modern graphics cards. See that by yourself:
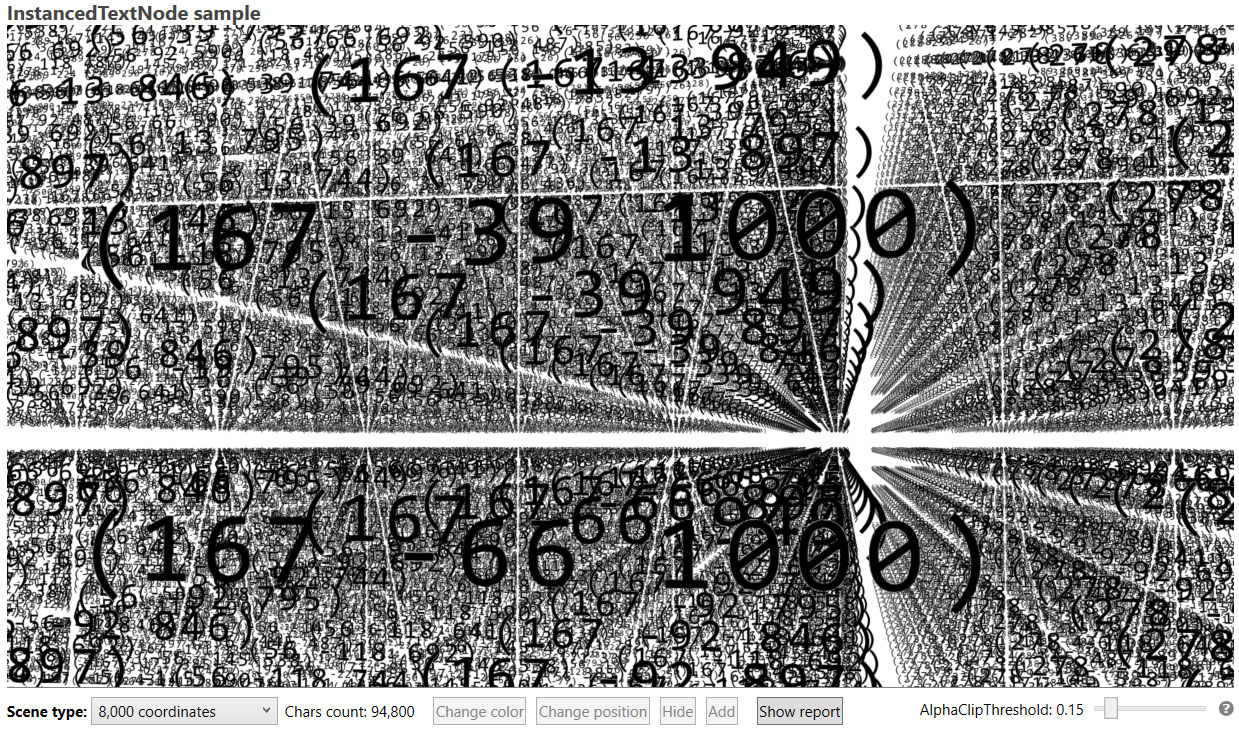
This screenshot is showing 8000 texts with different coordinates in the format "(xxx yyy zzz)". As seen in the screenshot, 94800 characters were used in the image. Impressive, isn't it! But what will you say if this screenshot is there only to make the texts easier to read and not to demonstrate the power of the new InstancedTextNode? To see the real power see the screenshot with 1 million texts (13.2 million characters):
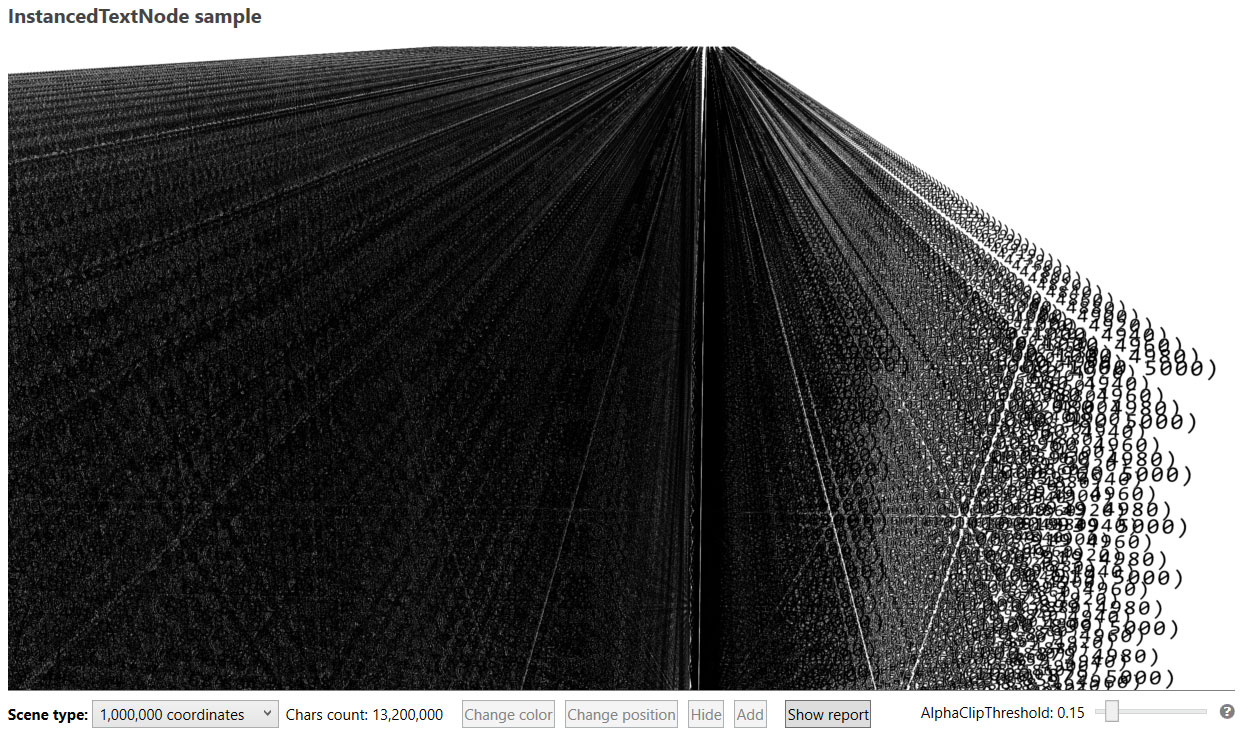
This can easily run with 60 FPS on a modern GPU. Get the latest version and check this out by yourself. It is really amazing!
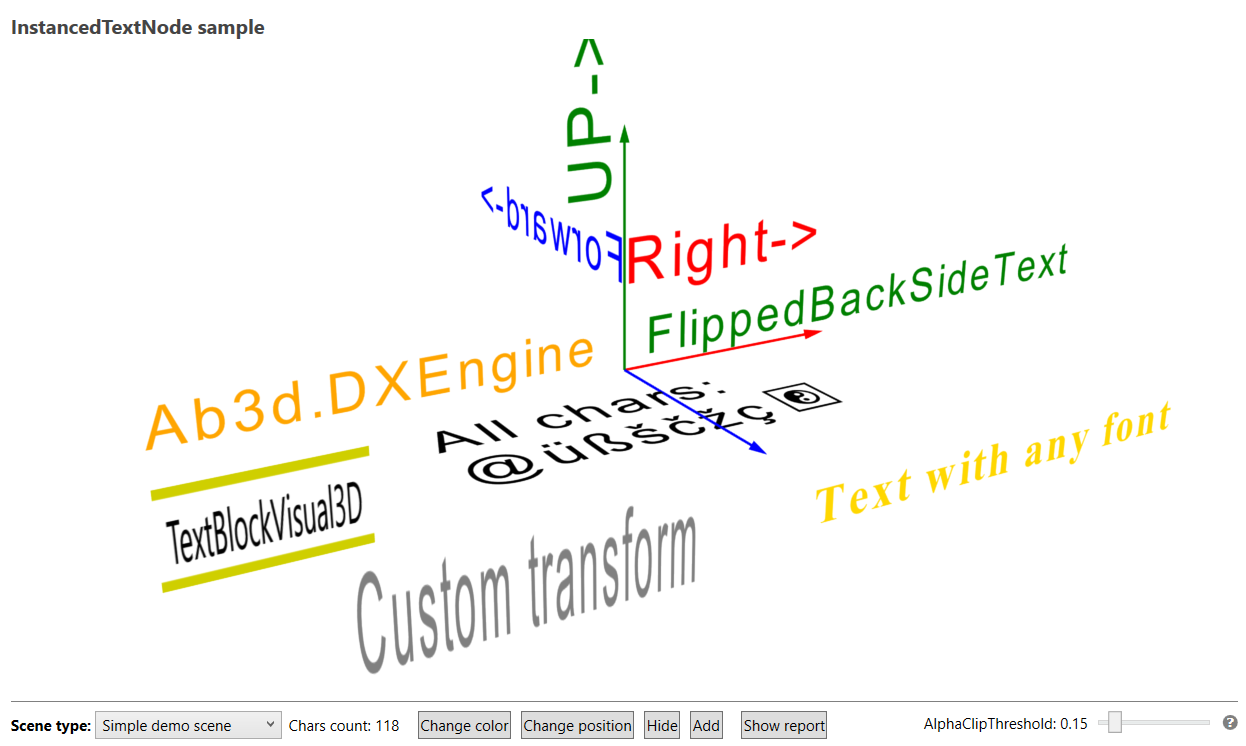
Though the previous two images used only black text, it is possible to set each text's position, orientation, size, and color. And after the text is shown, it is very easy to hide, show, move, scale and change its color. The following image shows that:
The InstancedTextNode achieves this level of performance by using DirectX object instancing and multiple textures - one texture for each character. When adding different texts to the InstancedTextNode, the code checks which characters are used in the text and when a character that was not used in any previous text is found, it renders the new character to a new texture. Then for each character in the text, it calculates a world transformation matrix and uses it for the InstanceData. Then it uses object instancing to render all instances (all appearances in all texts) of one character in one draw call. This is done for each character. Because some parts of the character textures are transparent, the InstancedTextNode uses alpha-clipping to discard the transparent pixels. This preserves the excellent performance because it avoids sorting the individual characters by their distance to the camera.
So the InstancedTextNode can be used when you need to render a lot of text. It can also be used to render just a few characters. But in this case I would still recommend using the TextBlockVisual3D object because it provides more options and is faster for rendering just a few characters - it requires one draw call to render the whole text while the InstancedTextNode requires individual draw calls for each character.
And the TextBlockVisual3D also got a few new improvements in this version. First, its Material and BackMaterial properties preserve the DiffuseMaterial instance (before new instances can be created when the properties were changed). Because the instance is now preserved, this means that you can easily assign special DXEngine's attributes to the Material and BackMaterial properties - for example, to use alpha-clipping. In the new version you can also assign a new UseSolidColorEffect DXAttribute. When UseSolidColorEffect is set to true, the text will be rendered without any lighting calculations. This can prevent dimming the text when the text does not face the lights. There is a new ImprovedTextBlockVisual3D sample available that demonstrates that and shows the benefits of using ImprovedTextBlockVisual3D in Ab3d.DXEngine.
This version also (finally) shows how to use object id bitmap. Object id bitmap is created by rendering the objects to a bitmap by setting each object's color to a unique color that represents object id. This way it is possible to get the object id from the color of each rendered pixel. The new version demonstrates that by showing how to make a rectangular selection of objects.
Because Ab3d.DXEngine can render millions of 3D lines with different display styles (line thickness, pattern, hidden lines), it is also used in some applications to show 2D lines and 2D shapes or to create a 2D shapes editor. To provide a demonstration on how this can be achieved, the new version comes with a new TwoDimensionalCamera class and 3 new samples. The TwoDimensionalCamera creates a camera that can show a 2D scene. The objects in that scene are still standard 3D objects - there the x and y coordinates represent the position in the 2D scene; the z value is usually set to 0 (but can be changed to render some lines or objects in front of or behind other lines or objects). The TwoDimensionalCamera supports moving and zooming the camera. A simple 2D lines editor sample shows how to create a line editor with snipping to positions.
When speaking of lines, there is another new feature that I want to talk about. It improves support for rendering 3D lines that are always rendered exactly to screen pixels. The previous version of Ab3d.DXEngine introduced super-sampling support that can produce very nice smooth lines. But because line coordinates are defined as float values, the lines on the screen can be rendered between screen pixels. For example, if a 1 screen pixel thick horizontal black line is rendered on a white background and if the line falls between two screen pixels, the line will appear as 2 pixels thick gray horizontal line - the black color will be distributed between 2 pixels. When rendering multiple thin horizontal and vertical lines (for example, in a grid) this may produce some unwanted effects. This can be seen because some lines appear black and sharp (rendered exactly to the screen pixels), some are gray and twice as thick (rendered between two screen pixels) and others are in between.
It was already possible to render lines that are rendered exactly to screen pixels. This can be done by setting UseGeometryShaderFor3DLines and RenderAntialiased3DLines properties on DXScene object to false. But this setting is applied to all lines. So also angled lines will be shown without any anti-aliasing. What is more, lines rendered without geometry shader can be only 1 pixel thick. Therefore this option was rarely used.
So each rendering option provides its benefits and its drawbacks. In the previous version it was not possible to mix them in a single scene. Now, this is possible. You can set the new UseGeometryShaderFor3DLines and RenderAntialiased3DLines DXAttributes to the selected 3D lines and specify how you want to render them. So you can render the horizontal and vertical grid lines as sharp 1 screen pixel lines and all other lines as standard smooth lines. Unfortunately, there is still a small catch - you cannot use super-sampling when using 1 pixel thick non-anti-aliased lines. The problem is that when using super-sampling, the line thickness needs to be increased by the SuperSamplingFactor so that when the super-sampling texture is down-sampled, the final line thickness is correct. But without using a geometry shader, it is impossible to increase line thickness, so when down-sampling the 1 pixel thick lines will appear 1/2 or 1/4 thinner. Anyway, you can still use multi-sampling. In the future, I plan to solve this problem by providing options to snap 3D lines to screen pixels.
And one final new feature that you may also consider important: the new version can prevent the UCEERR_RENDERTHREADFAILURE exception in WPF's render thread that can crash the whole application. That exception can sometimes occur when the primary monitor is changed. For example, when a laptop is connected to a secondary monitor with a duplicate screen option and then the laptop is closed. In this case, the secondary monitor becomes the primary monitor. It looks like there is a bug in the WPF that may crash the application. But I was able to prevent that by detecting the primary monitor's change and then recreating some of the internal objects. This seems to prevent the crash.
So, plenty of reasons to be excited about the new version. As always, start the new samples project and check the NEW and UP icons to see new and updated samples. For more details read the change log - here: https://www.ab4d.com/DXEngine-history.aspx and here: https://www.ab4d.com/PowerToys-history.aspx
And if you were wondering what is going on behind the scenes and wanted to peek into the Ab3d.DXEngine and Ab3d.PowerToys source code, now is the best time to purchase the source code. Just go to the purchase web page. The 30% discount is already applied to all source code items.
I wish you a nice and peaceful conclusion to this year. And also a few pleasant surprises (I hope this new version is one of them). And of course, happy and successful 2021!