I am very proud to present you a brand new DirectX 11 rendering engine – Ab3d.DXEngine.
The main purpose of the new engine is to bring you two mutually exclusive things: great power of DirectX and super easy to use WPF 3D API.
Using WPF 3D API means that there is already a lot of documentation and samples on the internet and in the books. What is more, the existing WPF application that show 3D graphics can be preserved and with only a few little changes converted into DirectX powered applications.
You can already try the release candidate version of the new engine – it is available from our downloads page as part of the trial products installer.
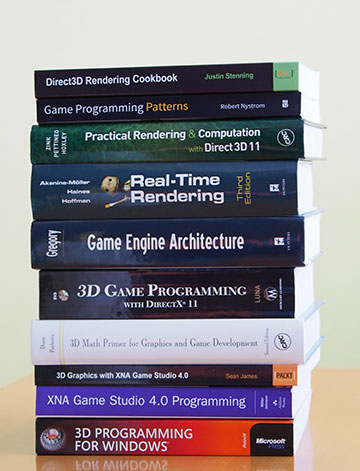
The road to the Ab3d.DXEngine was not easy and short. Creating a rendering engine is not an easy task. The following picture shows my pile of DirectX related books (I have started with learning XNA and then moved to pure DirectX; countless articles on the web are not photographed):
Working with DirectX is not easy. You need to understand many new concepts that are quite different from the traditional development used when developing standard applications. The amount of required knowledge is huge – you need to understand how modern graphics cards work, understand DirectX API with all its methods and properties and finally understand how to program graphics shaders and how to use GPU debugging tools. And it is not enough that you are satisfied with the rendered image. Everything also need to be optimized as much as possible for performance and memory usage. To achieve 60 frames per seconds, the whole rendering code have only 16 milliseconds to render all the objects (in reality there is less time than 16 ms available because of WPF overhead). Because rendering usually happens at 60 frames per second, the rendering code is executed a lot of times. This means that you need to be especially careful with memory usage. Every small memory inefficiency can become a big memory leak in minutes. This also means that creating new objects should be avoided to minimize running garbage collector.
So, working with DirectX is quite challenging. And probably even more challenging was to make the existing WPF 3D API work well with completely different DirectX API.
But the really great news is that you will not need to bother with all that complexity anymore because the new Ab3d.DXEngine allows you to use DirectX with the comfort of the WPF 3D API.
To make the transition from the WPF 3D rendering to DirectX rendering, you will only need to add one element to your XAML (sometimes some additional smaller changes are needed – see Ab3d.DXEngine help file for more info; it is also advisable to add some additional configuration options).
Instead of standard WPF 3D rendering:
<Viewport3D Name=" width="360" height="471"" />
        <!-- WPF Viewport3D content -->
    </Viewport3D>
You will need to enclose the Viewport3D into DXViewportView:
<dxControls:DXViewportView Name="MainDXViewportView">
    <Viewport3D Name="MainViewport">
        <!-- WPF Viewport3D content -->
    </Viewport3D>
<dxControls:DXViewportView>
This means that you can preserve the existing WPF 3D solutions and with just minimal changes you can achieve great improvements in rendered graphic.
This leads us to the advantages of using DirectX rendering over WPF 3D rendering.
The biggest advantage of the new rendering engine is that it is fully customizable (it will be also possible to buy full source code). You can create your own shaders, effects or otherwise change the rendering process. This also solves the biggest problem of WPF 3D – it was a closed box with no way to change it.
Another advantage of the Ab3d.DXEngine is the speed of rendering. Simply by using DirectX 11 instead of DirectX 9 (that is used by WPF) means that there will be performance improvements because of lower API overhead (less time is spend in DirectX and graphics card driver’s code). Additional improvements can be achieved because of more advanced API. For example WPF uses only 16 bit index buffer. This means that it can render 65535 triangle indices with one draw call. So if you are rendering an object with one million triangles, this means that 3 million triangle indices is needed – so WPF needs to split that into 46 separate index buffers and require 46 draw calls (one draw call is a DirectX method that issues drawing on the graphic card – lowering the number of draw calls is the easiest and most efficient method to improve performance). On the other hand, Ab3d.DXEngine uses 32 bit index buffer so it can render the same object with only one draw call.
For example the Predator model from the following screenshot has only a single GeometryModel3D with 2.9 million positions:
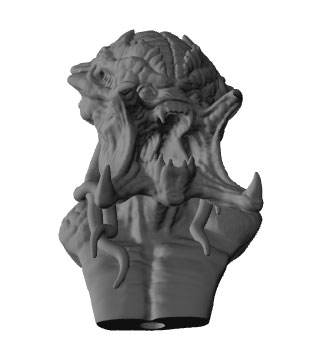
On NVIDIA GTX 970 and i7 3770 and with Ab3D.DXEngine it can be rendered in 0.3 milliseconds (theoretically allowing more than 3000 frames per second). With WPF 3D rendering the frame rate drops to only 14 frames per second.
The performance gains do not come only from DirectX API improvements but also from the design of the Ab3d.DXEngine. The engine internally organizes the objects in such a way that the number of draw calls and state changes is as low as possible and therefore rendering can be very fast.
The performance gains are even bigger when WPF objects are frozen (Freeze method is called on them). In such case Ab3d.DXEngine aggressively reorganizes and combines the models so that they are rendered blazingly fast.
I am also happy that the Ab3d.DXEngine eliminates the most common performance problem in WPF 3D – rendering many 3D lines. In WPF 3D rendering many 3D lines really kills the performance. The problem is that 3D lines need to be converted into triangles and each time the camera was changed all the triangles needed to be recalculated. This requires a lot of CPU time. In Ab3d.DXEngine this problem does not exist because the 3D lines can be very efficiently generated on graphics card in its geometry shader – so the Ab3d.DXEngine just send the 3D lines data (collection of start and end positions) to GPU and it rendered the lines very efficiently.
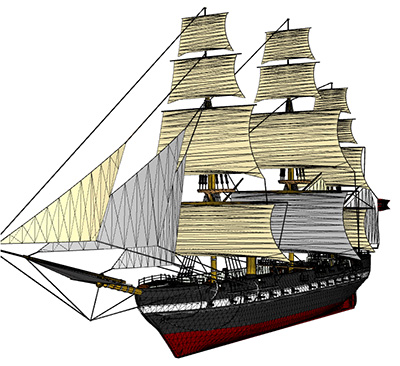
For example the wireframe scene from the following screenshot is rendered in around 0.7 ms (theoretically allowing around 1400 frames per second) when using Ab3d.DXEngine and gets only 3 frames per second when WPF 3D is used (on NVIDIA GTX 970 and i7 3770):
The list of performance improvements is not over. The Ab3d.DXEngine allows hardware instancing. This can achieve incredible performance gains when many instances of the same geometry need to be shown. Usually this is rendered in such a way that each instance is rendered individually and the position of the instance and its color is sent to GPU with its own draw call. When using instancing instead of drawing each instance individually we draw all instances at once – here we use a special draw command that requires data of the geometry and an array of colors and world matrixes (define the position, scale and rotation of each instance). So instead of many draw calls we can use only one.
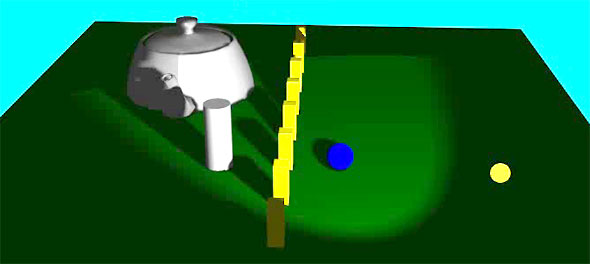
Another advantage is that the it Ab3d.DXEngine can render graphics in much better quality. The biggest difference is that WPF is using per-vertex lighting and Ab3d.DXEngine is using per-pixel lighting. This means that in WPF lighting calculations are done only for each vertex. Then the colors are interpolated between vertexes. In Ab3d.DXEngine the lighting calculations are done for each displayed pixel. This is best seen in the following screenshot where WPF rendering is on the left and Ab3d.DXEngine rendering is on the right (note the accurate spot light cone and accurate reflections on the sphere – despite having low number of segments):
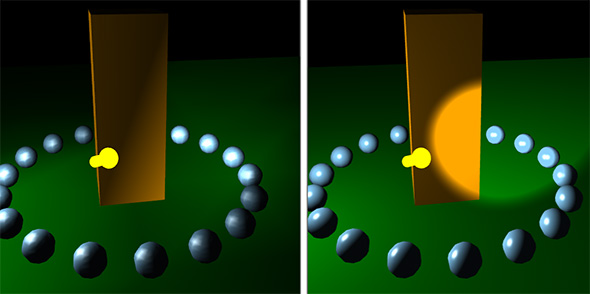
The image above shows that the rendered quality is already significantly improved. But because Ab3d.DXEngine can get easily customized, it will be possible to add many great visual effects in the future.
I am planning to add support for shadow mapping. Actually I already have a working sample, but it still needs some polishing to be publicly available:
Shadow mapping is only one of the effects that will be added to the engine. I am also planning to add support for environmental maps (enabling natural looking reflections on metallic objects), screen space ambient occlusion (adding subtle shadows that make objects look more realistic), bump mapping, depth of field, etc. Because of the open nature of the engine this list is practically endless.
I would also like to point out one aspect of the new engine. It allows you to slowly get familiar with DirectX and graphic shaders. Usually if you would like to add DirectX to your application, you need to acquire a lot of new knowledge – how to set up DirectX environment, prepare the buffers, render objects, write graphic shaders and lots of other tiny details that each must work or you will see just a black screen. The great thing that Ab3d.DXEngine brings is to allow you to slowly dive deeper and deeper into the DirectX world. You can start with simple WPF 3D API – cameras, lights and models (geometry with material). Then you can use the source of the existing shaders and play with it. This will slowly introduce you to the hlsl shaders language. After that you can try to create your own shaders that require different constant buffers or input semantics. You can also prepare special objects that use some other draw methods. (note that the current version does not come with shaders source code; also I would recommend to wait until version 1.1 – the reason is that I am planning to significantly change the layout of the constant buffers and will also focus on improving support for custom shaders).
I would also like to quickly describe the difference between the Ab3d.DXEngine and many other DirectX game engines.
There are really many different game engines available – from top class engines for AAA games to free and open source game engines. As the name implies, the main purpose of the game engine is to build a game. This means that a product of a game engine is a package with its own executable and many game resources. The user of the game engine spends most of his time in the game editor where he designs game levels, defines model properties and write some scripts.
If you want to create a business application that requires some 3D graphics, you could theoretically still use a game engine to render the 3D graphics. But practically this would mean that you will need to hack the engine to become something that it was not designed for. You will also need to significantly change your application to meet the constraints of the game engine.
On the other hand the Ab3d.DXEngine was designed to be used in business applications.
The biggest advantage of this design is that it is very easy to integrate the 3D graphics into existing user interface. For example, a thing that all WPF developers take for granted is to be able to mix layout elements so that you can place elements on top of each other. Also if an element on top has some transparent parts, the elements below will be visible. This is something that is almost impossible to achieve when using game engine – game engines complete the frame drawing with calling the DirectX Present method – this method requires that SwapChain is used and the SwapChain requires its own window handle – practically this means that the area of screen that is used by the 3D engine cannot be used by any other application. This means that you cannot put a button on top of the 3D scene. With the Ab3d.DXEngine the rendered image can be used just as any other WPF element (this is the default presentation type - DirectXImage; with simple change of a PresentationType property you can change that to DirectXOverlay presentation type that uses the same presentation technique as game engines – this is needed when you want to use graphics debugging tools).
The engine is also optimized to support the most common use cases for 3D graphics in business applications. For example the engine supports both perspective and orthographic cameras. The engine can also easily render back face materials (rarely used in game engines). There is also a very good support for object picking and for rendering 3D lines and wireframe models.
And finally, you do not need to learn C++ to use DirectX. You can stay in the most efficient environment for developing application - .Net. Note that Ab3d.DXEngine is primarily meant to be used in WPF application, but it can be also easily used in WinForms applications.
I would really like to invite you to try the new rendering engine. It can be downloaded from our Downloads page as part of the products trial. The engine also works well with the Ab3d.PowerToys library (though it is recommended to use the lasts 7.1 version – it also works with older version but you might need to adjust some things – see the DXEngine’s help file for more info). If you already have an older commercial version of Ab3d.PowerToys installed, you can still safely install the latest trial version (you will need to manually enable the Ab3d.PowerToys in the installer at the products selection page).
If everything goes well, I am going to release the Ab3d.DXEngine in October 2015.
This will be only the first version of the engine. It will not contains all the goodies of DirectX graphics like shadow mapping and other effects. But it will already have enough powerful features to significantly improve your existing WPF 3D applications. And one of its main purposes is also to establish a good foundation for the future expansions.
If you would like to receive news about the Ab3d.DXEngine, please subscribe to the newsletter. If you are an existing customer, you can do this with visiting your User Account page and subscribing to changes for Ab3d.DXEngine. Otherwise you can also subscribe to newsletter on our blog.
Also, please give us some feedback. You can do this by simply sending me an email to support@ab4d.com or write to a new DXEngine forum section.
I really hope that you are as excited about the Ab3d.DXEngine that I am. This will really bring a new era to the 3D graphics programming for business applications.